
So, you want to start a blog? Congratulations!
Having a blog for the last six years has been an incredibly rewarding creative outlet where I get to share the beautiful photos I take, the words I feel and write and the thoughts I have. This space is mine and I love being able to make it just the way I like it - from the design to the layout and the content to the colours.
Along the way, I've had friends, family and small businesses (I work in Digital Marketing Management!) reach out and ask for guidance on how to start their own platforms and to bring their own dreams to life.
Well, finally, all in one place are all my carefully collected and curated tips on how to go about setting up your own online space! If you need a hand or have more questions, please don't hesitate to reach out and if you'd like to just hire me to get the work done, we can discuss that, too 😉
All the websites I have created and worked on were developed on WordPress, which, in my opinion, is the best web development platform out there in terms of user experience, range of functionality and professionalism.
There are two WordPress platforms available:
- WordPress.com
This is a mostly free platform where you create a website hosted by WordPress with limited functionality. It's a great start for to play around with having a website. You won't have a lot of control over what you can do with the platform, but for some people that might be just right. The basic version is free; you can upgrade to get various additional features and business functions.
You can create your own WordPress.com website here!
- WordPress.org
This is the main platform for WordPress and is where all the awesome plugins, features, widgets, themes and coding controls live. The rest of this blog post will walk you through how to set up one of these kinds of sites!
1. Find a Host
One of the main differences between WordPress.com and .org is that the .com version is hosted by WordPress. Once you start building your own website through .org, you'll need to find your own host.
A website host essentially gives your website a 'home' on the internet. It's the place where your website will live and be broadcasted to the world wide web. There's a whole range of hosts out there; you'll need to do some research on a few things:
- Where in the world your host's server is based (a physical location)
- How much storage space you'll need
- What type of hosting you'll need (shared, dedicated, VPN)
Yoast (my favourite SEO company) has compiled a detailed list of a bunch of awesome hosts. Take the time to have a look through the best one for you.
2. Buy a Domain Name
Now you'll need to pick a name for your blog and buy the domain, which is the yournamehere.com your website will be called. For example, my domain name is JanaMeerman.com.
Make sure that when you're picking a name that you choose something that is not limiting! I wouldn't choose something like 'My Trip to Paris' if you actually want to write about your trips all around the world. Make sure you have a name that clearly describes what you want to write about but is general enough to allow you to expand your horizons.
In my case, I went with my name. It's my personal brand and all my social media and email accounts are under the same. It means I can write about absolutely anything because it all falls under 'me'. And besides, I happen to be the only Jana Meerman on Facebook so it's a pretty unique name!
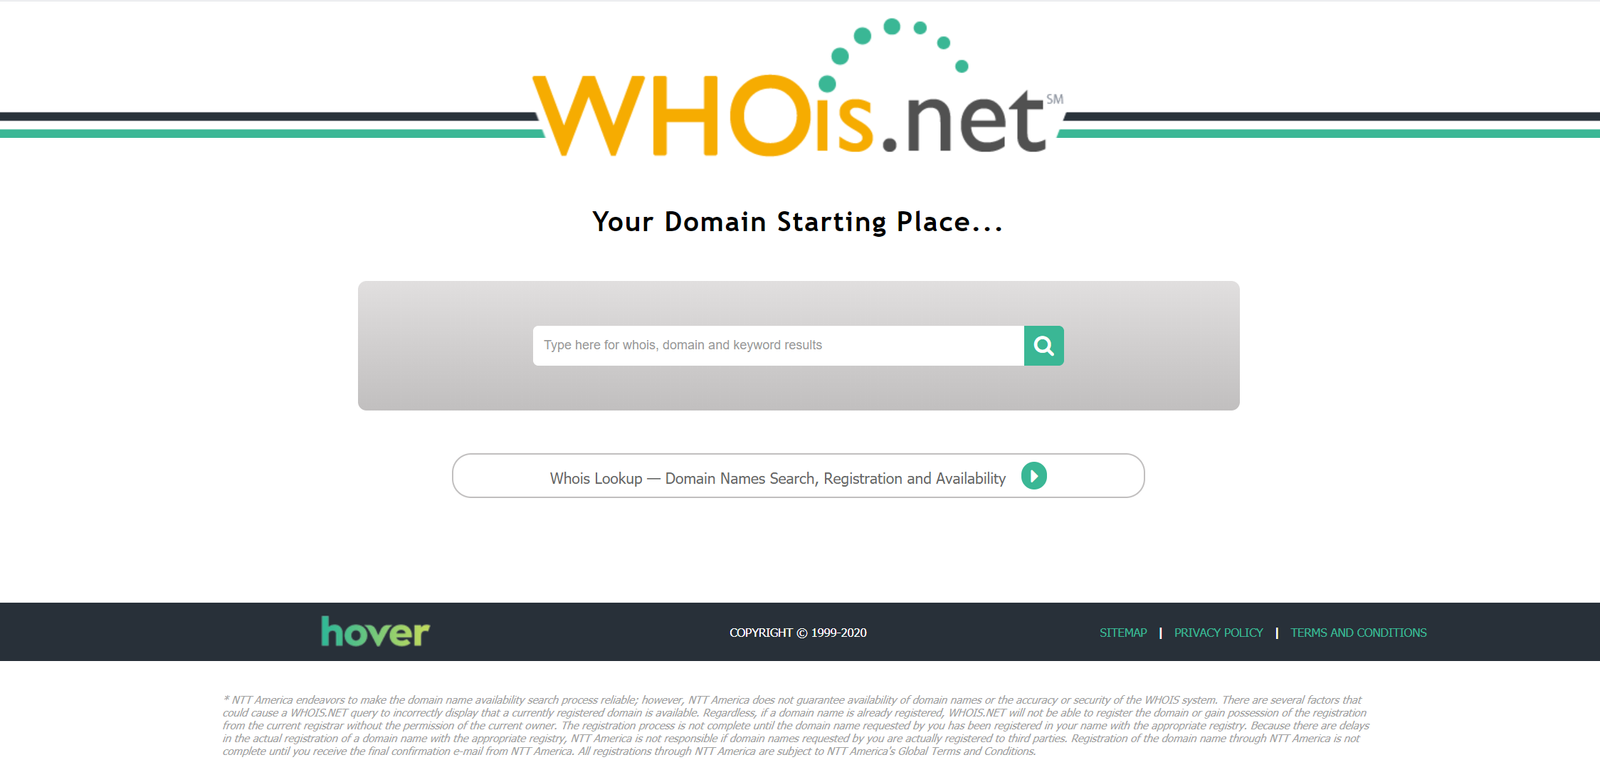
Next, you'll need to make sure no-one else has yet claimed the domain you want! The best way to do this is by going to Whois.net and typing in the domain you want to own. It will let you know whether or not the domain has been registered.
Once you've found your perfect name and it's available for purchase, pick the place where you want to buy it from - I use Free Parking. My parents actually bought JanaMeerman.com for me way back in 2000 when I was just four years old, you know, just in case 😉
3. Set up HTTPS
You don't want your site showing up as unsafe in search engines; it will only discourage viewers from accessing your site.
In order to show that you have a safe and secure website that encourages people to explore your content, you'll need to make sure you have an SSL certificate. Your host should be able to provide this for you. Essentially, it means that your website URL will be https://yournamehere.com instead of http://yournamehere.com.
http:// allows every server between your user and your site to see what the users are doing. Comparatively, https:// means that all connections and communications between your user and your site are encrypted.
Essentially, indicates to search engines like Google that you are a real human with a real website with real content and it's safe for web browsers to access. This is a crucial part of any website.

What will be displayed in the URL bar if you don't have SSL

How your website will look with secure SSL
4. Download WordPress
You will be provided a back-end login to the WordPress software. First, you'll need to download the WordPress zip files. Then, you'll need to login to your dashboard which you can locate by typing: yournamehere.com/wp-admin. Make sure you have a secure username and password!
WordPress provides a guide to installing WordPress if you're still confused!
Your dashboard is where you'll be able to do all your creating - from here you make new posts and pages, arrange your menu, customize everything about your site, add widgets and plugins, design your website, upload images and other media and track your analytics.
Check out this great beginner's guide to the WordPress dashboard.
5. Choose a Theme
The theme is the basic design and layout of your blog. You can change your theme as many times as you like but be aware that customized changes you make to your theme will be erased if you switch themes to be sure to back them up in a child theme before switching!
You can start out with playing with the free themes available from WordPress - look under Appearance in the sidebar and then Themes.
I bought my theme from pipdig.co, a website that designs beautiful, visual-based themes. Things to consider when on the hunt for your perfect theme:
- menu design
- sidebar and footer options
- what your blog is based on (ie. mine is predominantly travel so I looked for a theme that offered maps and locations)
- clarity
- user-friendly
Make sure you choose a vetted theme - anyone out there can make a theme and you want to make sure you're buying and working with a good quality piece of software that plays by the rules!

6. Customize
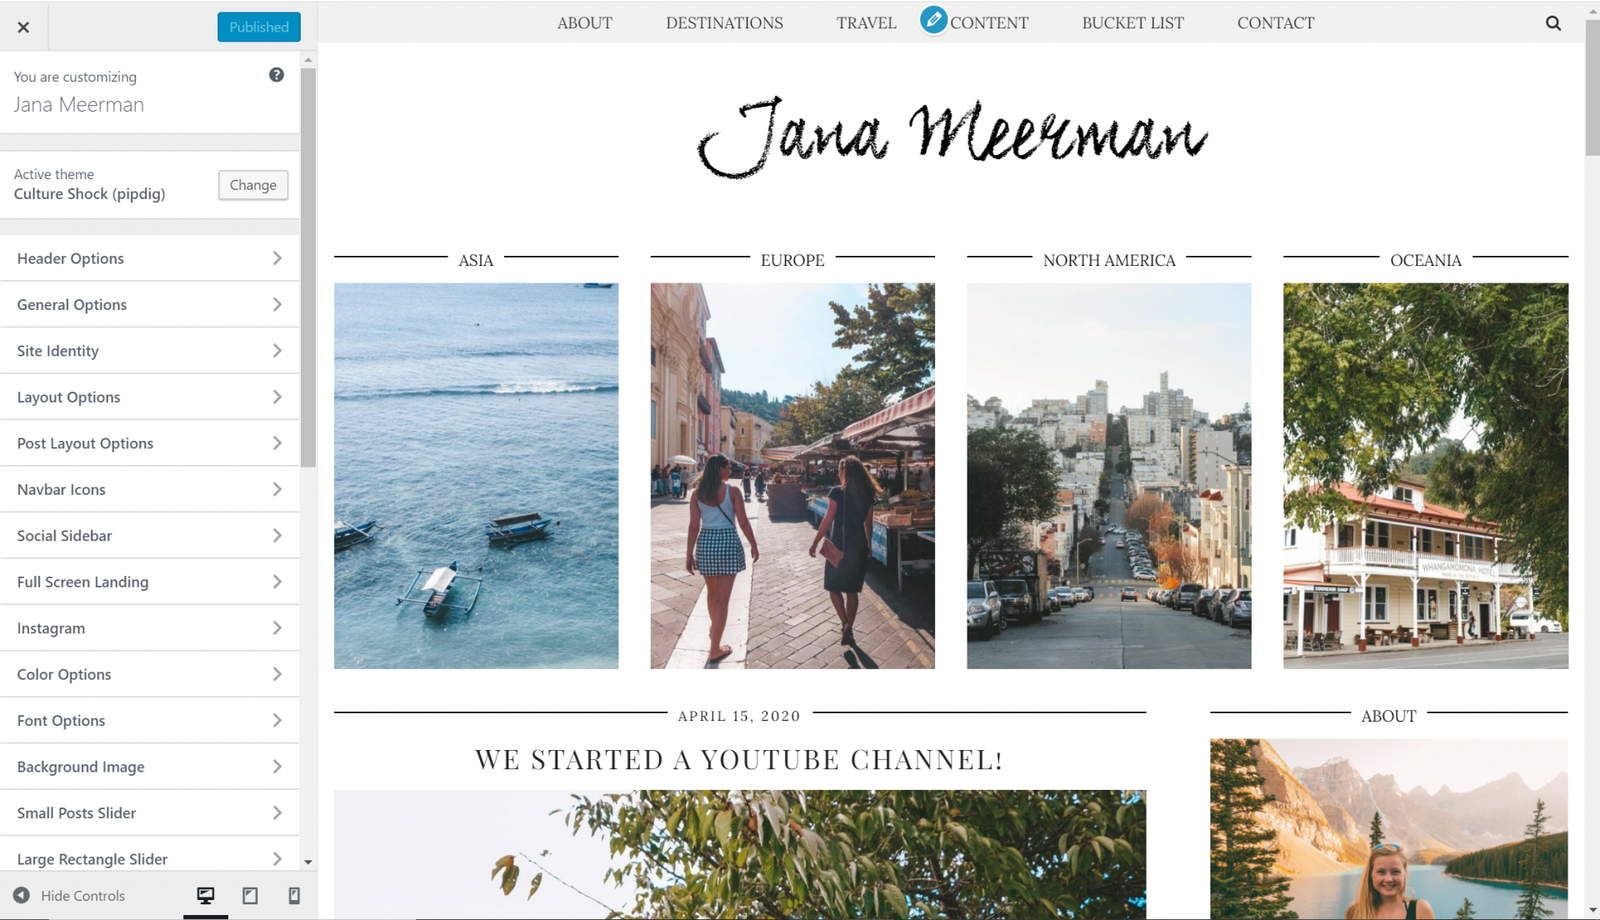
Once you've installed your theme, you can start to customize your website to make it look the way you want it to! Head to Customize under Appearance to make changes to things like your colour scheme, menu placements, fonts and text sizes and home page design (static vs blog feed) and take the time to explore all the options your theme offers.
7. Widgets & Plugins
To make your website even more personalized and awesome, delve into the world of widgets and plugins.
Widgets are pre-built 'blocks' offered by WordPress that allow you to get creative with your design by offering specific functions like lists, Instagram feeds, follow buttons, social media icons, search bars and images. You can place these widgets in pre-determined places (your theme will tell you where) such as the sidebar, the footer or within blog posts and pages. You can find widgets under Appearance.

The widgets my theme offers and where I can place them
- Plugins
Plugins are pieces of software coded to allow you to install additional functions to your website. Some are developed by WordPress, many are developed externally. You can do so much with plugins - anything from spam protection, backup plans, e-commerce, content translation... the list is endless.
When downloading plugins, be sure to look for ones that have been tested with your current version of WordPress (so they don't break your site!) and that have been peer-reviewed with lots of thumbs-ups. Anyone can create a plugin, so you want to make sure you're adding good quality coding to your site.
Some of my favourite plugins include:
-
- Akisment Anti-Spam - protects your website from malicious spam
- Smush - compresses your images so your site loads quickly and beautifully
- Google Analytics - use this to check your analytics such as number of viewers
- Simple 301 Redirects - use these to redirect old links to new pages/posts
- Site Origin Widgets Bundle - all the awesome widgets you can use with Page Builder
- Updraft Plus - to backup all your precious content
- WP ULike - a simple like button to add to your posts/pages
- Yoast SEO - the only search engine optimization solution you'll ever need
8. Create Content!
Now for the fun bit! Here is where you'll put together everything you want to publish on your website.
- Pages
Pages allow you to publish content that doesn't have a date but is constantly relevant and needs to be easily accessible. Some of the pages I have on my blog include:
Your pages will not be categorized and thus should be easily located from your menu or other places on your homepage.
- Posts
Posts are dated blog posts that run on your website like a feed. If you're predominantly a blogger, this will be the bulk of your content, allowing you to write ongoing articles. If you're a brand or a business, you may like to include a blog section with various articles about the work you're up to!
When you include links to external content, be sure to always click the option to have them open in a new tab so that users don't navigate away from your site!
- Categories
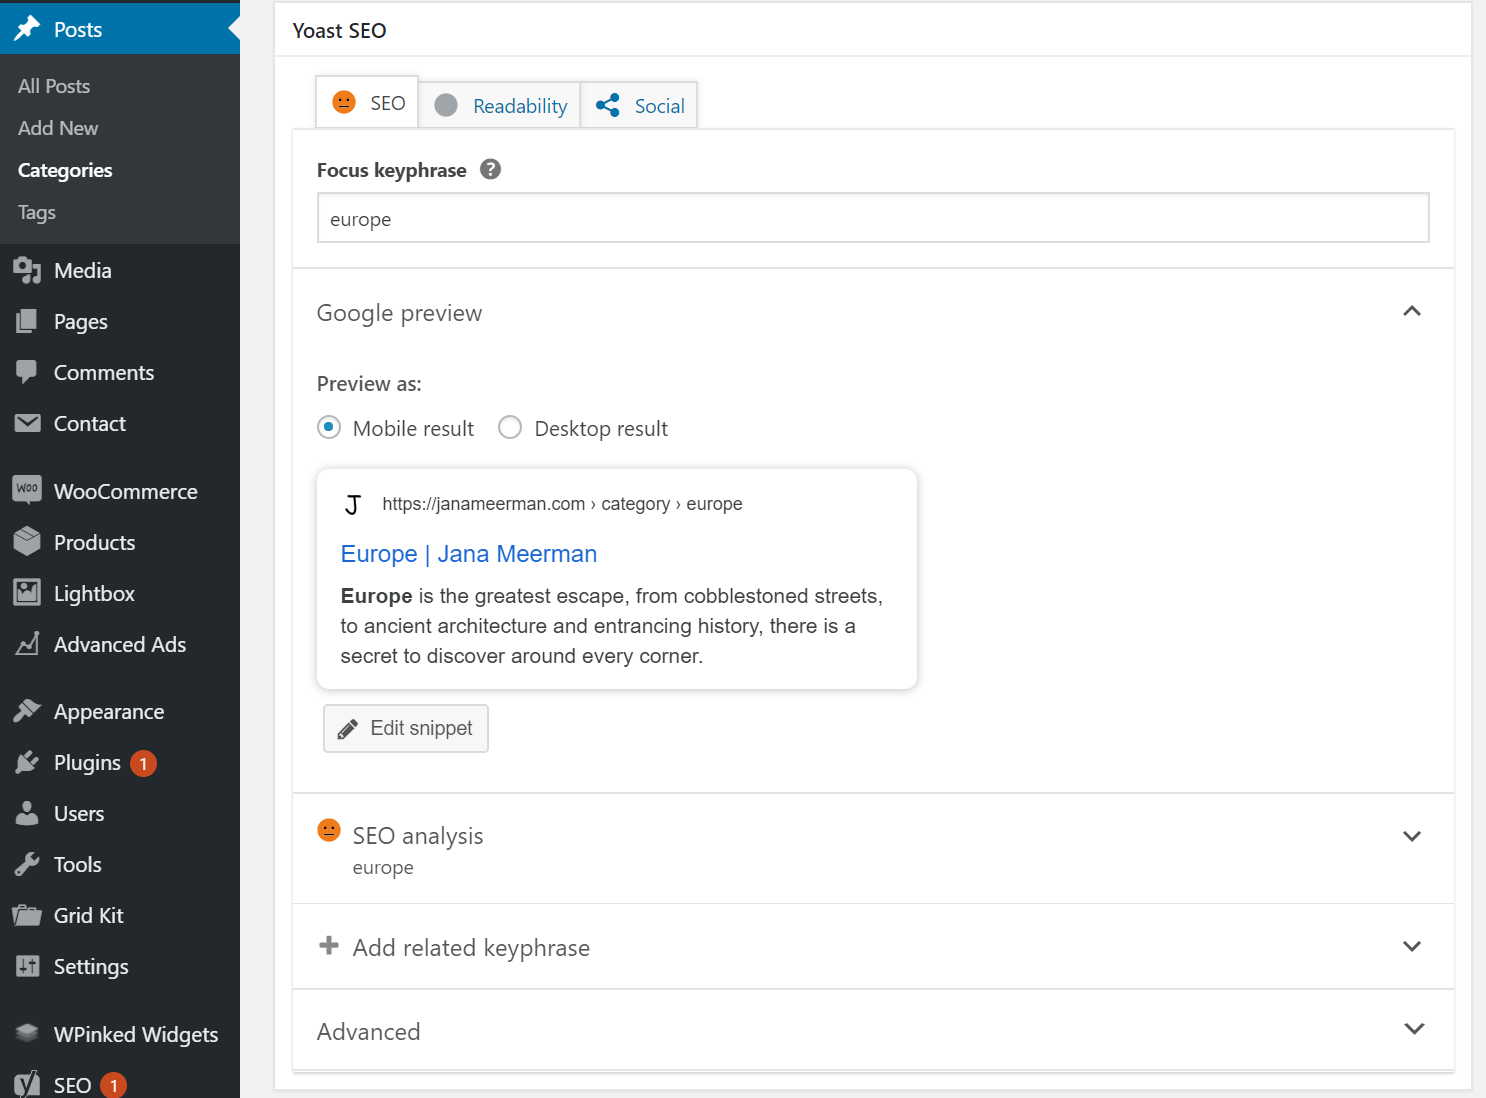
You should create categories for your posts that allow you to sort them by content. You can use these categories in your menus so that you can easily find blog posts relating to certain things. I have a category for each country I visit, each activity I write about (such as hiking!) and types of accommodation I stay in (such as van life or hostels).
Take the time to update the description for each category you make using keywords so that people can better find your content through search engines. You can do this using the Yoast plugin:
9. Search Engine Optimization (SEO)
SEO is SO important for your website. It's the main way your website is going to get found on search engines such as Google. The better your SEO, the more likely you're going to get found. You need to make sure you're using effective keywords that will assist you in getting your content found.
Yoast is the absolute best SEO plugin. Once it's installed, you'll find it at the end of your posts and pages where you can optimize your keywords, Google snippet and slug (ie. janameerman.com/how-to-start-a-blog).
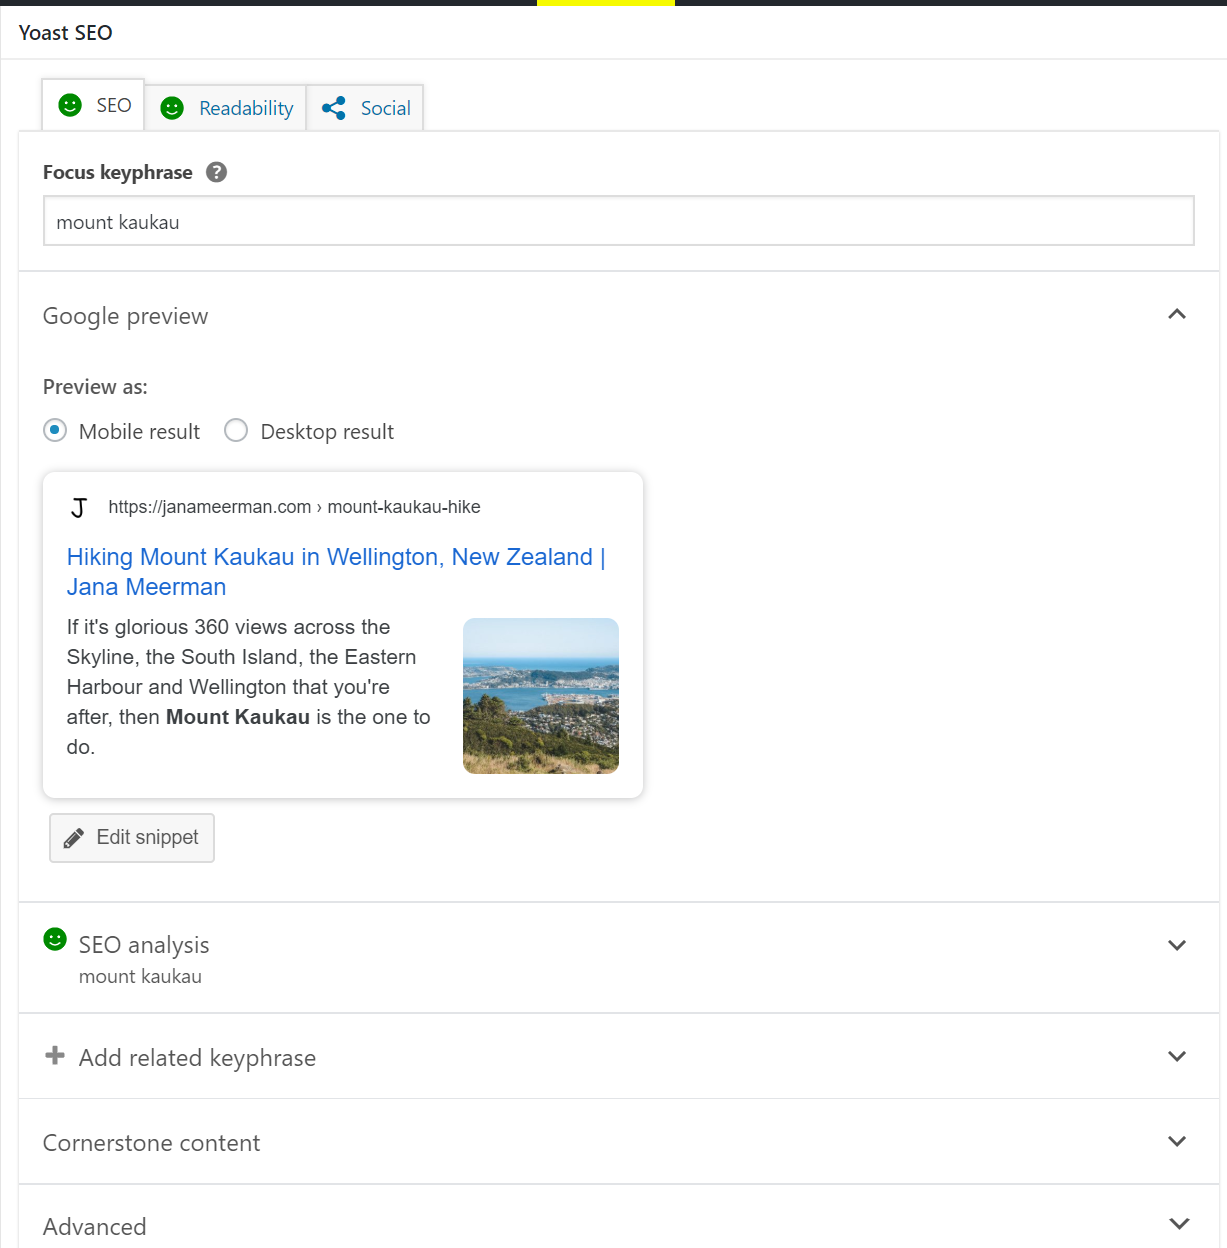
Another way to up your SEO game is to make sure that all the images you upload onto your website are labelled with your domain name. This means that when people search for images, yours will start coming up and will encourage more viewers to navigate to your site.
All of my images are labelled: jana meerman [content / place / hike name / etc.]
10. Menu & Navigation
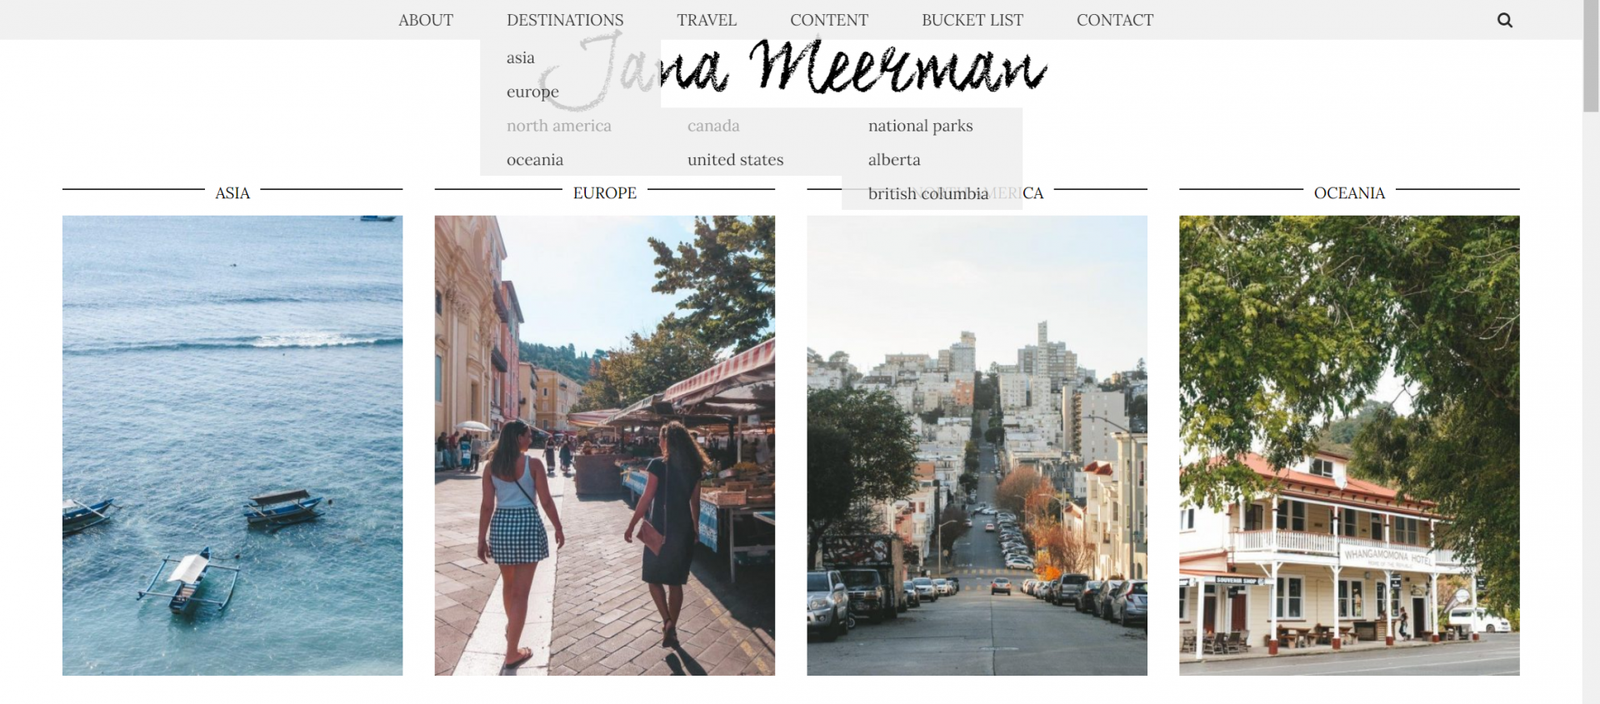
You're going to want it as easy as possible to find the information they're looking for on your website. This starts with clearly labelled categories, posts and pages, but is navigated by your menu.
Every theme will offer at least one menu, often called a Primary Menu, but many will offer secondary ones as well that you might want to include in your sidebar or footer.
I only use one menu and it sits at the top of my website. It is fixed to the top so that even when you scroll endlessly down the page, the menu stays visible and always accessible.
Make clearly defined headings and subheadings using your categories and pages that you want to feature. You can even make sub-sub-headings to make it really obvious where things sit!
11. Monetize
Sometimes, people just want a personal space to put creative things out into the world. Other times, people use websites and blogs as a way to add a source of income. You can do this in a few ways:
- Place ads on your website
I recommend setting up an account with Google AdSense and placing a few ads on your website. Don't go overboard though! No one wants to visit a website that is overloaded with advertising. For example, I have 2 ads sitting in my sidebar.
- Join affiliate programs
You can sign up to a whole range of affiliate programs - such as Amazon - which allow you to place a customized link on your website for people to buy products. If they use your link to purchase, a percentage of the commission will be given to you at no extra cost to the buyers!
12. Publicize!
No-one's going to know about your website if you don't tell them! I constantly post about my blog to make sure people know there's new content out there. Every time I publish a new post, I:
- post a link on Facebook using relevant hashtags and tagging brands/companies
- post a link on Twitter using relevant hashtags and tagging brands/companies
- share 2 graphics I make with Canva to Pinterest with a link back to my blog
- share the images to Tumblr
- if it's a really special post I'm extra proud of, I'll also post a link on LinkedIn
- Bloglovin' automatically shares new posts which is the best platform to view all your favourite blogs in one place
- I send out a monthly newsletter that includes all my latest blog posts and other updates
I also have a link to my website on all my social media platforms so people can route back here.
PIN THIS POST TO REFER BACK TO LATER!
Hi! I’m Jana, a Dutch-German-British-Canadian with a dream of seeing every country in the world. I am a storyteller, photographer and adventurer passionate about documenting and sharing my travels.
